Hi Freddy,
Thanks for the reply!
That's interesting how the clipping mask works with images. I didn't know how that worked. It explains some "weird" behavior that I was seeing with images out of Indesign, in the relationship between the clipped image and the mask (this is with PDFs made straight out of Indesign with "Crop image data to frames" turned on in the PDF export settings.)
I guess I should explain what I'm trying to do with my action, maybe I'm barking up the wrong tree with my technique.
I'm somewhat new to this area of Pitstop Action scripting, it's a very deep program and so it's hard to find the most efficient way to do things; even trying to do something that seems "simple" can be daunting because of the huge array of choices of actions.
What I'm trying to do is create an action that will mirror an image+mask or a vector object around any of the 4 axis of that image (left, right, top, bottom.) I want to do it with any object on the page that I select, in any area of the page. The action will be run with "User Selection" only.
The procedure that I came up with, for reflecting an object along its right edge/axis:
1) Manually select the Image+Mask Object on the page
2) Manually copy/paste so that the object is pasted on top of itself (make sure in Pitstop preferences the offset for copy/paste is 0). This makes the copy the actively selected objects, and so actions will run on this copy of the objects.
3) Run this action ("User Selection"):
Code: Select all
a. Flip Selection Horizontally ("Visible Area of Selection" in Dropdown)
b. Resize art box to Selection
c. Move Objects to Corner ("Place center left of the graphic elements relative to the center right of the art box.")
The script works mostly as I expect with vector objects, but I ran into the problem with Image Masks and so I came here

. The "Move Objects to Corner" works better for me rather than the "Align" actions because with "Move Objects to Corner" I can pin to any edge of the art box (which would allow me to reflect in any direction horizontally or vertically.)
I was wondering is there a better way to do this?
Thanks for your help or advice you can give!
Here's my eal:
Here's the output with two types of simple objects:
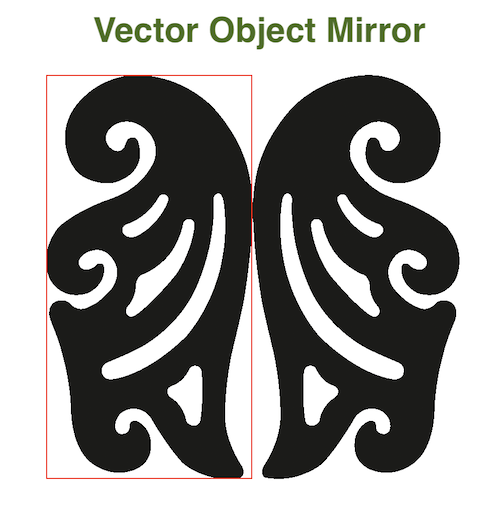
- Vector Mirror.png (116.68 KiB) Viewed 10878 times
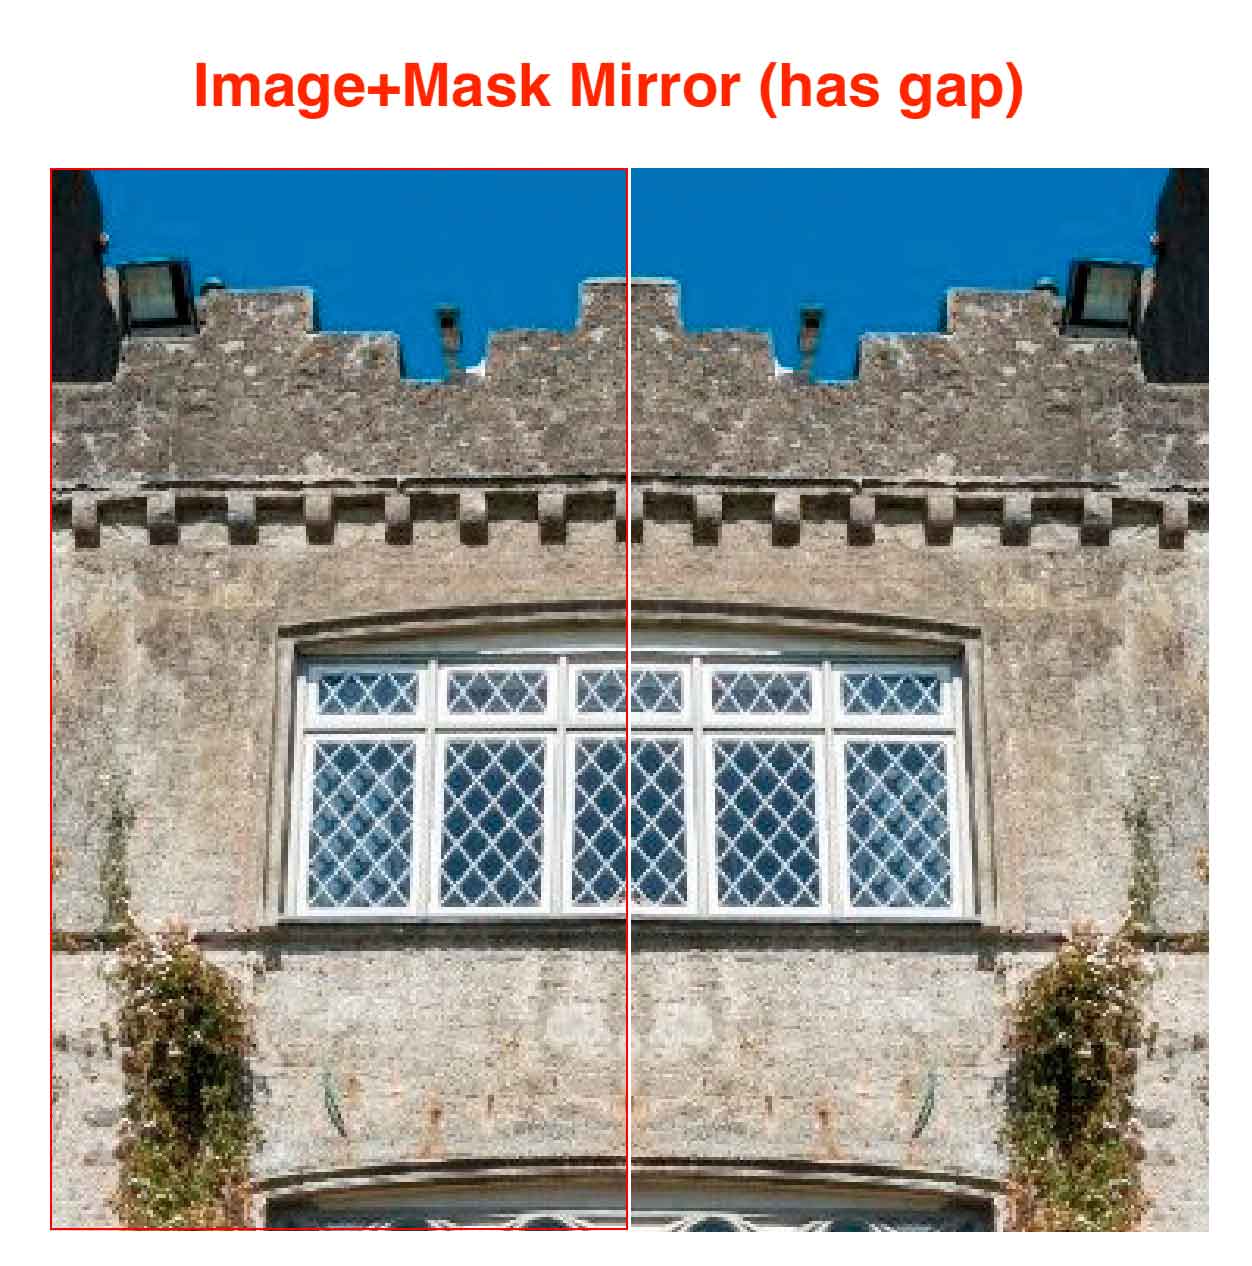
- Image-Mirror.jpg (132.66 KiB) Viewed 10878 times