A while back I started using the default action list "Generate Bleed to 3MM if Some, None, or Not Enough". Often it does a good job. Sometimes it works on some elements of a page and not on others. I've come to accept this, not expecting it to work 100% of the time.
I'm trying to make some improvements and I noticed something. Back when I started using the action list, it was constructed as this:
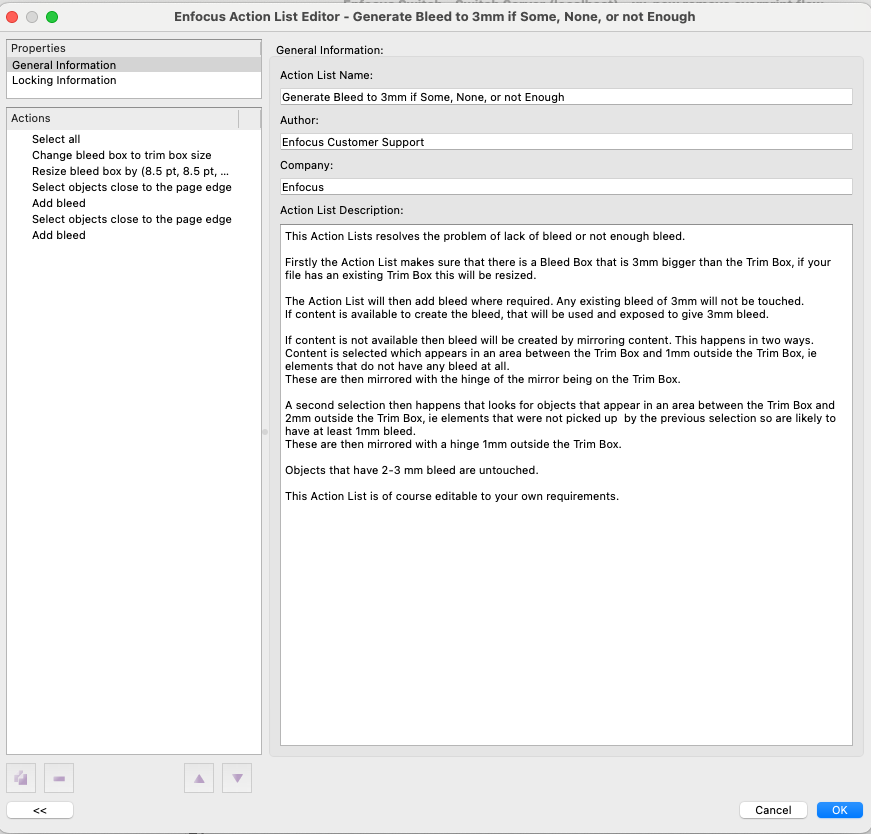
- Generate Bleed - Original.png (113.65 KiB) Viewed 14987 times
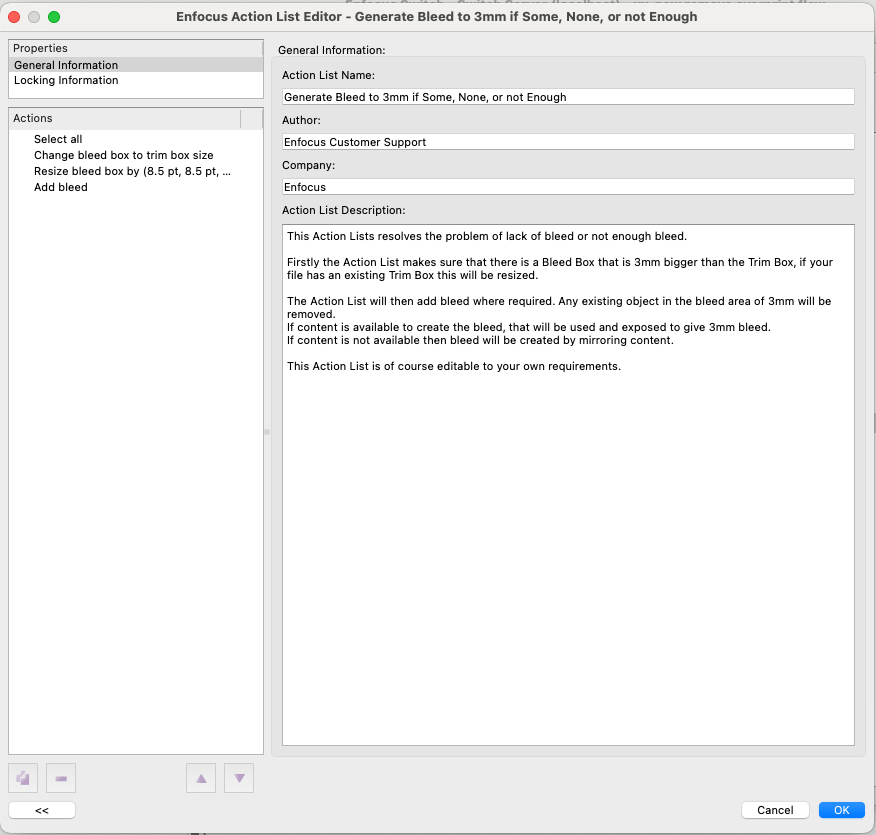
Now, the default action list that comes with version 24 looks like this:
- Generate Bleed - New.png (87.73 KiB) Viewed 14987 times
You can see, on the original, there are two selections being made, and the add bleed applied to each selection. In the revised, only one Add Bleed, with Select All. The descriptions of each action list changed accordingly. My question is: does anyone know what prompted Enfocus to make this adjustment to the default action list? Because I am currently using the original (copied into my Local action lists), I'm wondering if I should switch over to the new default and see some improvement.